Extending the Map
Map view displays cluster resource on a graph. Plugins can extend this graph by adding nodes and edges.
Nodes, edges and sources
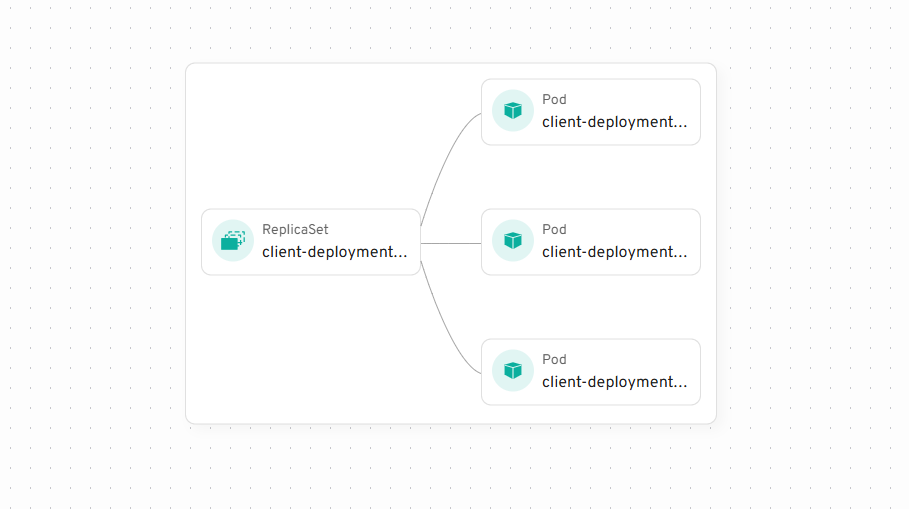
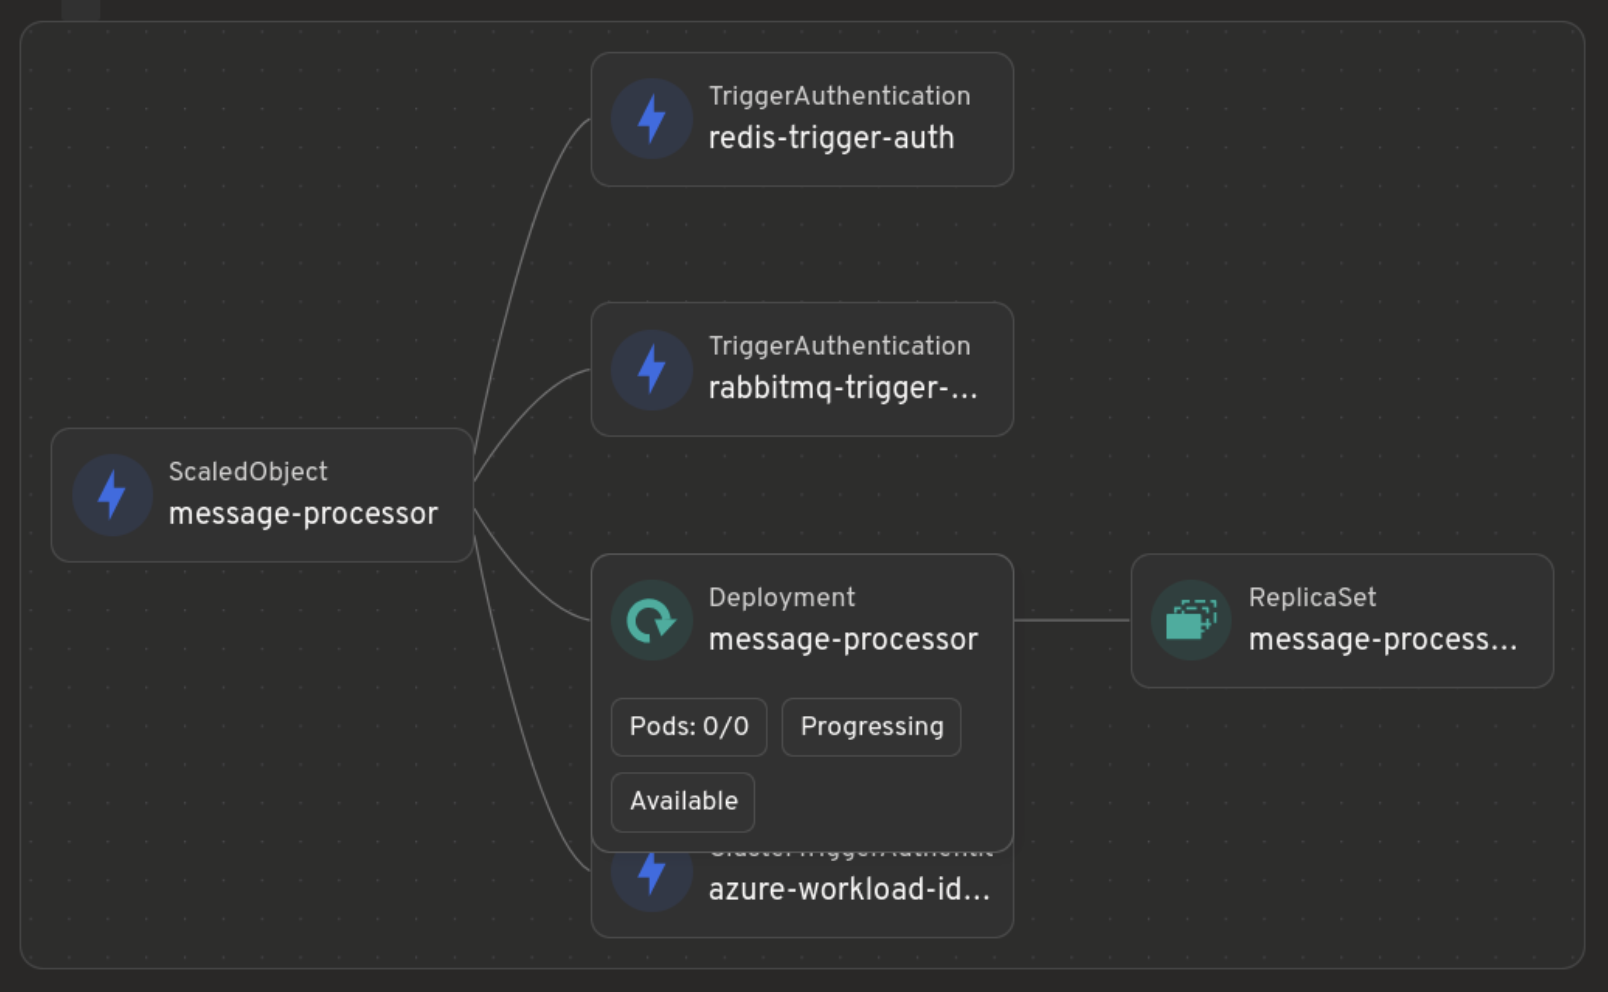
Node represents a Kubernetes resource. Edges connect different nodes, for example ReplicaSet connects to Pods it owns.
Node and edge IDs should be stable and unique. When multiple selected sources return the same node or edge ID, Headlamp renders the first graph element for that ID.
To add your own nodes and edges you need to define a Source
A graph Source represents a collection of Nodes and Edges along with name and icon. Source may contain other Sources.
Creating and registering a Source
To define a Source create an object with the following structure:
const mySource = {
  id: "my-source", // ID of the source should be unique
  label: "My Source", // label will be displayed in source picker
  // you can provide an icon
  icon: (
    <img
      src="https://headlamp.dev/img/favicon.png"
      alt="My Source logo"
      style={{ width: "100%", height: "100%" }}
    />
  ),
  /**
   * useData is a hook that will be called to load nodes and edges for your source
   * You can use hooks here that Headlamp provides to load Kubernetes resources
   * this hook should return an object with nodes and edges or `null` if it's loading
   * it's important that return object is not recreated every time, so useMemo is required
   */
  useData() {
    return useMemo(() => {
      // This would come from kubernetes API but it's hardcoded here as an example
      const myResource = {
        kind: "MyResourceKind",
        metadata: {
          uid: "1234",
          name: "my-test-resource",
          namespace: "test-namespace",
          creationTimestamp: "1234",
        },
      };

      const edges = []; // no edges in this source
      const nodes = [
        {
          id: myResource.metadata.uid, // ID should be unique
          kubeObject: new KubeObject(myResource),
          status: "warning", // Optional: "success", "warning", or "error"
          // Optionally provide a custom details component to be shown when node is selected
          detailsComponent: ({ node }) => {
            return (
              <div>
                <h2>Custom Details View</h2>
                <p>
                  This is a custom details view for:
                  {node.kubeObject.metadata.name}
                </p>
              </div>
            );
          },
        },
      ];

      return { edges, nodes };
    }, []);
  },
};
When status is provided, the node participates in the map's warning/error badge and the
"Status: Error or Warning" filter. If status is omitted, Headlamp falls back to its default
status detection for Kubernetes objects.
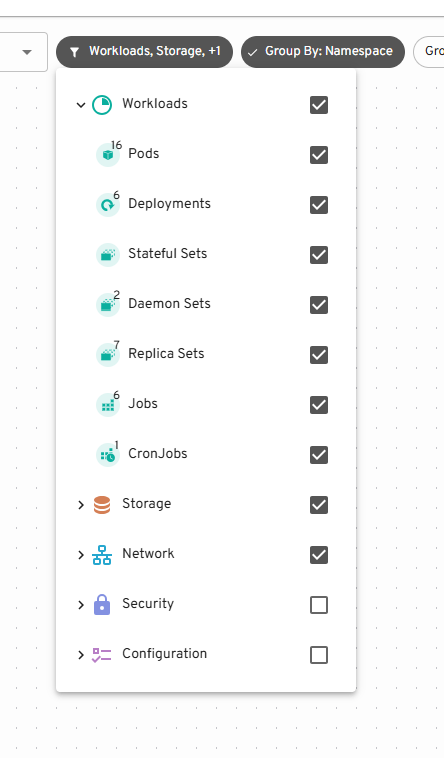
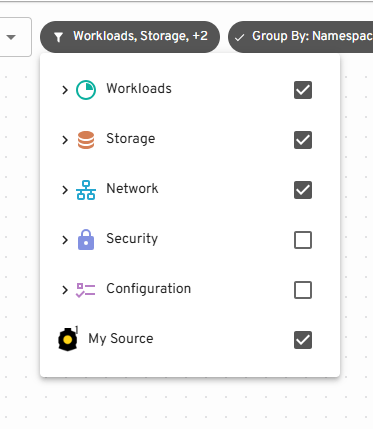
Then to register it call registerMapSource
registerMapSource(mySource);
You'll now see it in the Source picker and the Node on the Map:
![]()
Node Icons
To add an icon to the Node you need to call registerKindIcon.
Note: This is different from the Source icon. One Source may contain multiple different kinds of objects.
registerKindIcon("MyCustomResource", {
  // icon is a JSX element
  icon: <img src="https://headlamp.dev/img/favicon.png" />,
});
![]()
Custom Detail Views
When a node is selected on the map, its details are shown in a side panel. By default, if the node represents a Kubernetes resource (has kubeObject property), Headlamp will show the standard resource details view.
You can override this behavior by providing a custom details component:
const myNode = {
  id: "custom-node",
  label: "Node with custom details",
  detailsComponent: ({ node }) => {
    return (
      <div>
        <h2>Custom Details</h2>
        <p>This is a custom details view for: {node.label}</p>
        {/* You can access any node property here */}
        <pre>{JSON.stringify(node, null, 2)}</pre>
      </div>
    );
  },
};
The details component receives the node object as a prop, giving you access to all node properties.
This is useful when you want to:
- Show custom visualizations for your resources
- Display data from external sources alongside Kubernetes resources
- Create interactive detail views specific to your use case
Custom Glance Component
When hovering over a node in the map, a preview (or "glance") is displayed. For Kubernetes resources, Headlamp provides default glance components. You can register a custom glance component for any node type (Kubernetes or custom) using registerKubeObjectGlance.
Here's how you can register a custom glance component:
const CustomNodeGlance = ({ node }) => {
  // Check if the node represents a Kubernetes object
  if (node.kubeObject) {
    return (
      <div>
        <strong>{node.kubeObject.kind}:</strong>{" "}
        {node.kubeObject.metadata?.name}
      </div>
    );
  }

  // Handle non-Kubernetes nodes with label or fallback to a default
  if (node.label) {
    return (
      <div>
        <strong>Node:</strong> {node.label}
      </div>
    );
  }

  // Return null if the node cannot be rendered by this glance
  return null;
};

registerKubeObjectGlance({ id: "custom-node", component: CustomNodeGlance });